Create And Revamp Your Own Offline ChatGPT On Local PC With GPT4All LLM In Java
Following the advent of ChatGPT by OpenAI, the uptake rate and popularity of this technology has surged and continues to rise exponentially to this date. The resulting paradigm shifts have already been reflected in multiple facets of our lives; ranging from the ways we work to switching our default go-to source of information to answer day-to-day questions. While the masses are fawning over the convenience ChatGPT has brought about, there is also the other side of the coin which the mainstream media is seemingly under-reporting – (1) "What happens during a power/network outage or server malfunction on user/provider's end?", (2) "What if there is no internet connection at the workplace?" or (3) "Would data privacy be compromised?" etc.
Applying (2) to the real-world context, this is extremely relevant since it is a known fact that workers in high-security settings such as healthcare and military defence have to carry out much of their work with little to no network access.
This is simply because the risks of any unwanted data leakage (e.g. patient health data) are risks which cannot be afforded in these high-stakes settings. In turn, this then naturally begs the question of "Is ChatGPT or other technologies alike off-limits to members of this group?"
In short, the answer is no since fortunately, the open-source community has created alternatives with comparable performance. More specifically, a category known as "Offline ChatGPT" has emerged amidst ongoing competition among commercial and open-source rivals.

Project Motivation
Running ChatGPT Offline On Local PC
Increased reliability leads to greater potential liability.
Apart from the aforementioned target audiences, it is also worth noting that similar to Google Maps, ChatGPT is at its core an API endpoint made available by a 3rd-party service provider (i.e. OpenAI). As such, it shares common single points of failure such as inability to operate due to lack of/limited internet connection or breach in data confidentiality when exchange of highly sensitive data occurs, technically making all end-users susceptible to any liability posed by their reliance on the usage of any online GPT service providers.
Thankfully, some of these drawbacks can be mitigated by turning to "Offline ChatGPT"s, which are locally run and keep input/output information private and contained.
Choice of localised ChatGPT: GPT4All
There were 2 key points of consideration which led me to this choice.
- Straightforward setup
The official GPT4All site provides concise and precise instructions to set up its interactive chat interface for both developers and end-users alike. Under the segment "Installation Instructions", there are 3 types of selection available for download –

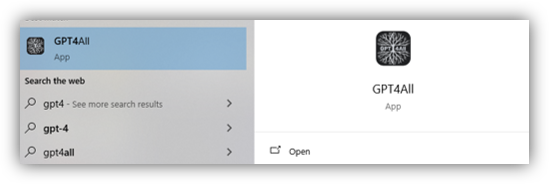
Upon installation, chat application interface can be launched from the start menu –
2. Ease of customisation (for developers)
While the chat application itself is fairly user-friendly, its convenience does come at the expense of rigid user experience. It is not platform-independent since it requires different installer builds for each OS.To improve user experience, the application is configured at source code level using GPT4All Java bindings, eliminating the need for custom builds.
As such, to improve user-experience, I embarked on this pet project to configure the application on a source code level using GPT4All Java bindings (version 2.4.11) to **** eliminate the need for custom builds and re-package it as a portable and standalone tool.
Important note on GPT4All version
Only GPT4All v2.5.0 and newer supports models in GGUF format (.gguf). At the time of this post, the latest available version of the Java bindings is v2.4.11 – which are compatible with solely GGML formatted models. (Source: Official GPT4All GitHub repo)
Steps To Set Up GPT4All Java Project
Pre-requisites
- Both JDK 11 and JDK 8 installed on the PC. Installers can be retrieved from Oracle (by default project runs on JDK 11 platform)
- (Optional but preferred) A Java IDE such as NetBeans or Eclipse (note that in this demo NetBeans shall be used)
- Download a sample model such as ggml-gpt4all-j-v1.3-groovy.bin (~ 3.5GB) to test generated responses
Based on the above GitHub documentation, download the Java bindings which are packaged into a single jar file – gpt4all-java-binding-1.1.5.jar and include it in the project classpath:
    com.hexadevlabs
    gpt4all-java-binding
    1.1.5

Other mandatory JAR dependencies to be included are:
- asm-9.2.jar
- asm-analysis-9.2.jar
- asm-commons-9.2.jar
- asm-tree-9.2.jar
- asm-util-9.2.jar
- jffi-1.3.0.100-native.jar
- jffi-1.3.0.jar
- jnr-a64asm-1.0.0.jar
- jnr-ffi-2.2.13.jar
- jnr-x86asm-1.0.2.jar
- slf4j-api-1.7.36.jar
- **slf4j-simple-1.7.35.jar***
***** Rationale for JAR file –

Important. Do note that the JDK platform used to run this source code is JDK 11.
Sample application code
The application code to test run its functionalities can be found at the same GPT4All GitHub repo link.
Sample application output

- Certain core features shown from the above test run include model loading, user prompt input (hardcoded) and output of generated response by the GGML model (For a list of other sample ggml models, feel free to check out model.json.)
Additional Steps Required For Project Configuration
In alignment with the aim of this project to make the GPT chatbot platform independent and personalise user experiences, specific issues I have decided to tackle here are –
- JDK 8 incompatibility
- Chatbot response formatting
- Native binaries extracted from JAR file on runtime (more details below in step 2)
Step 1. Import source code of gpt4all-java-binding-1.1.5.jar
In order to tweak its source code, the non-compiled artifacts including its original source code in gpt4all-java-binding-1.1.5.jar must first be retrieved. This can be done by either running the below command to clone the GitHub repo (assuming GIT is installed) –
git clone https://github.com/nomic-ai/gpt4all.gitor selecting "Download ZIP":

Navigate to ./gpt4all-bindings/java where src directory is present and paste its contents into the Java project IDE.

Step 2. Extract the binaries from gpt4all-java-binding-1.1.5.jar to the project folder
To access binary files packaged in a JAR file, use a file unarchiver such as 7zip and proceed to retrieve the folder native as shown.

Step 3. Remove gpt4all-java-binding-1.1.5.jar and switch to JDK 8 project platform
Finally, exclude Java bindings JAR from classpath and configure project to run on JDK 8 instead of JDK 11. The project setup shall now resemble the following:

Technical Implementation – 5 Steps In Total
Step 1. Tweak the source code in each respective file to resolve compatibility issues with JDK 8
File: Application.java

Before: try (LLModel model = new LLModel(Path.of(modelFilePath))) {
After: try (LLModel model = new LLModel(Paths.get(modelFilePath))) {
File: LLModel.java

Before:
return bufferingForWholeGeneration.toString(StandardCharsets.UTF_8);After:
//        return bufferingForWholeGeneration.toString(StandardCharsets.UTF_8);
StringBuilder textBuilder = new StringBuilder();
InputStream is = new ByteArrayInputStream(bufferingForWholeGeneration.toByteArray());
try (Reader reader = new BufferedReader(new InputStreamReader(is,
Charset.forName(StandardCharsets.UTF_8.name())))) {
    int c = 0;
    while ((c = reader.read()) != -1) {
        textBuilder.append((char) c);
    }
} catch (IOException ex) {
    System.err.println(ex.getLocalizedMessage());
}
String str = textBuilder.toString();
return str;
Before:
Map message = new HashMap<>();
message.put("role", "assistant");
message.put("content", generatedText);
response.choices = List.of(message);
return response;
After:
Map message = new HashMap<>();
message.put("role", "assistant");
message.put("content", generatedText);
response.choices = Arrays.asList(message);
return response;
File: Util.java

Before: searchPaths.put(libraryName, List.of(librarySearchPath));
After: searchPaths.put(libraryName, Arrays.asList(librarySearchPath));
Note that any attempts to run the application at this point would be unsuccessful as the required native binaries (previously extracted) have yet to be loaded by the application.
Step 2. Ensure that native binaries are loaded from external folder
In the LLModel(Path modelPath) constructor in file LLModel.java, notice that in the if-else code block, the following lines of code are present in the else condition:
// Copy system libraries to Temp folder
Path tempLibraryDirectory = Util.copySharedLibraries();
library = Util.loadSharedLibrary(tempLibraryDirectory.toString());
library.llmodel_set_implementation_search_path(tempLibraryDirectory.toString() );
These are responsible for extracting all required native bindings (file extensions .dll and .so for Windows and MacOS respectively) contained within gpt4all-java-binding-1.1.5.jar when it was included in the project's classpath. Now that this JAR library has been removed, the native bindings would have to be loaded from another source instead. For this to occur,
- Create a new folder named "external" in the project folder.
- Place the extracted folder
nativeand the model ggml-gpt4all-j-v1.3-groovy.bin into the newly created directory (external). - In Application.java file, replace
modelFilePathwith:
String modelFilePath = System.getProperty("user.dir") + File.separator + "external" + File.separator + "ggml-gpt4all-j-v1.3-groovy.bin";This updates the specified location of the model read by the application as well. At this point, the project directory structure should resemble this:

Thereafter, modify the constructor class in LLModel.java –
- Comment out the
if-elseblock - Insert code snippet to check which OS application is running on
- Create new variable
libPathto refer to the exact folder path where the native bindings are located (folders should still be named based on system OS)
public LLModel(Path modelPath) {
    logger.info("Java bindings for gpt4all version: " + GPT4ALL_VERSION);
    if(library==null) {
        String osName = System.getProperty("os.name").toLowerCase();
        boolean isWindows = osName.startsWith("windows");
        boolean isMac = osName.startsWith("mac os x");
        boolean isLinux = osName.startsWith("linux");
        if(isWindows) osName = "windows";
        if(isMac) osName = "macos";
        if(isLinux) osName = "linux";
        String libPath=System.getProperty("user.dir") + File.separator + "external" + File.separator + "native" + File.separator +osName;
        // if (LIBRARY_SEARCH_PATH != null){
        library = Util.loadSharedLibrary(libPath);
        library.llmodel_set_implementation_search_path(libPath);
        //   }
        //   else {
        //   // Copy system libraries to Temp folder
        //   Path tempLibraryDirectory = Util.copySharedLibraries();
        //   library = Util.loadSharedLibrary(tempLibraryDirectory.toString());
        //
        //   library.llmodel_set_implementation_search_path(tempLibraryDirectory.toString() );
        // }
    }
    // ... (code continues below) ...
Step 3. Interim clean-up of source code
Apart from code changes made in steps 1 & 2, other code tweaks to be made in Application.java are:
- Remove the console printout behaviour by commenting out
System.out.print(validString);in LLModel.java - To remove the default break line before the bot response, include the following code snippet in Application.java –
char c = 10;
fullGeneration=fullGeneration.substring(fullGeneration.indexOf(c)+1);
Specifically, certain functionalities such as copySharedLibraries in Util.java and chunks of commented code can be now removed (since binaries are now loaded from an external folder). Note: For cleaned up versions of these 3 files (LLModel.java, Util.java and Application.java), feel free to retrieve them from here.
Assuming the above directory structure, proceed to launch application –

If response is successfully generated and returned without errors, then application has now essentially become both portable and platform independent.
Step 4. Construct look and feel of chatbot response and GUI
Presently, the default prompt is hardcoded as "What is the meaning of life?" To input custom prompts, a simple chat interface shall be implemented with built-in Java Swing components. Proceed to create a new class "ChatPanel.java" with the below boilerplate –

Since the application requires only one entry point, retain the main method in ChatPanel.java and remove the other in Application.java. Convert Application.java into an entity class instead (renamed to ChatApplication.java)—
- Create an instance of
ChatApplicationin the main classChatPanel - Call function
getResponse()to parse in prompt text and return complete response generated

Demo Prompt: ❝What are some ways to become more resilient?❞

Step 5. Add a Splash Screen
Finally, you may have noticed that there is at least an interval of ~10 seconds before model is loaded in the first step. As such, it could be beneficial to have a splash screen to signal that application is still loading before the GUI displays itself.
While there are several ways to create a splash screen using Java Swing, I shall be using the component JWindow for this demo where the splash screen displays the following loading.gif —

Include the following code snippet in ChatPanel.java:
private static final JWindow splashScreen;
private static final String dataURI=""; // replace value with the actual dataURI
static {
    GraphicsEnvironment grEnv = GraphicsEnvironment.getLocalGraphicsEnvironment();
    double w1=grEnv.getMaximumWindowBounds().getWidth();
    double h1=grEnv.getMaximumWindowBounds().getHeight();
    int w0=400; // width of gif file
    int h0=194;// height of gif file
    int leftW = (int) ((w1-w0)/2);
    int bottomH = (int) ((h1-h0)/2);

    byte[] fileBytes = Base64.getDecoder().decode(dataURI);
    Icon loadingIcon=new ImageIcon(fileBytes);

    splashScreen=new JWindow();
    splashScreen.setLocation(leftW, bottomH);
    splashScreen.setAlwaysOnTop(true);
    splashScreen.setSize(w0, h0);

    Container displayInfoWindowPane=splashScreen.getContentPane();
    displayInfoWindowPane.setLayout(new GridLayout());
    JLabel displayIconLabel=new JLabel();
    displayIconLabel.setIcon(loadingIcon);
    displayIconLabel.setVerticalAlignment(SwingConstants.CENTER);
    displayIconLabel.setHorizontalAlignment(SwingConstants.CENTER);
    displayIconLabel.setVerticalTextPosition(SwingConstants.BOTTOM);
    displayIconLabel.setHorizontalTextPosition(SwingConstants.CENTER);
    displayInfoWindowPane.add(displayIconLabel);

    splashScreen.setVisible(true);
}
To minimise the no. of external file dependencies, the GIF file graphics would need to be encoded into Base-64 Data URI format. For this task, I shall be re-using a web utility tool at encode_base64 I had developed in a previous post:

Assign the copied String to the variable dataURI (currently an empty String). Thereafter, remove the prefix data:image/gif;base64,***** from dataURI for encoded data to be read correctly.
*_The prefix is used solely to indicate the mime type of the data and should be excluded in this setting._
In the main method of ChatPanel.java, right after the line frame.setVisible(true);, add in the following line to remove the splash screen after chat interface appears:
splashScreen.dispose();Run Application
Export the application (gpt4all.jar) as a runnable JAR file* and double-click it to launch the chatbot:

*Runnable JAR can be generated depending on the IDE used. Else, there is an open-source utility OneJAR at SourceForge which performs the same function.
